Bubbles and Wrinkles Post was left with a cliff hanger of how to deal with the vexing blemishes. A number of people have got back to me with advice.
Asian Lacquer Sample Boards Post 8 – Bubbles and Wrinkles
For my research I want to compare the working properties and long term aging characteristics of three types of urushi, transparent urushi processed in Japan from Chinese urushi, Black Roiro urushi processed in Japan from Chinese urushi, Black Roiro of Japanese urushi.
One of the well known difficulties in the application of the finishing coats is the prospect of dust particles marring the coating. There are many recommendations for avoiding this, including the ancient tale of performing urushi coating in a boat on a lake at night when there is the least dust in the air. Although I am on the ocean here in Halfmoon Bay moving the entire operation to a boat was not going to happen. Instead I embarked on massive lab clean up, tidying, dusting, vacuuming, and washing the floor.
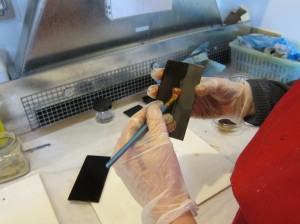
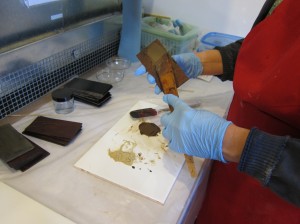
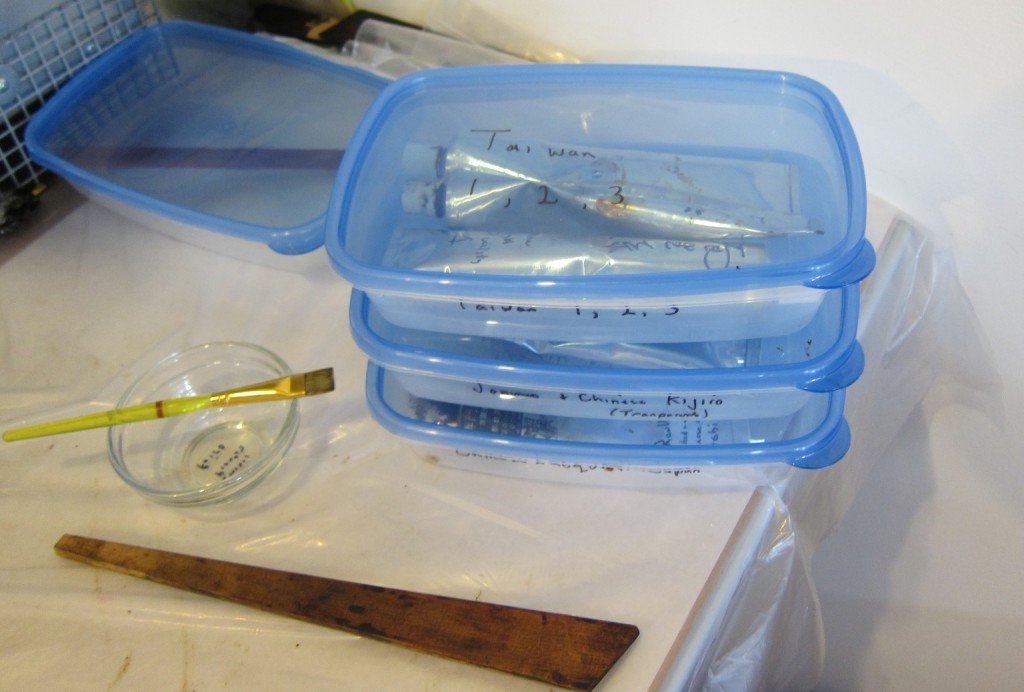
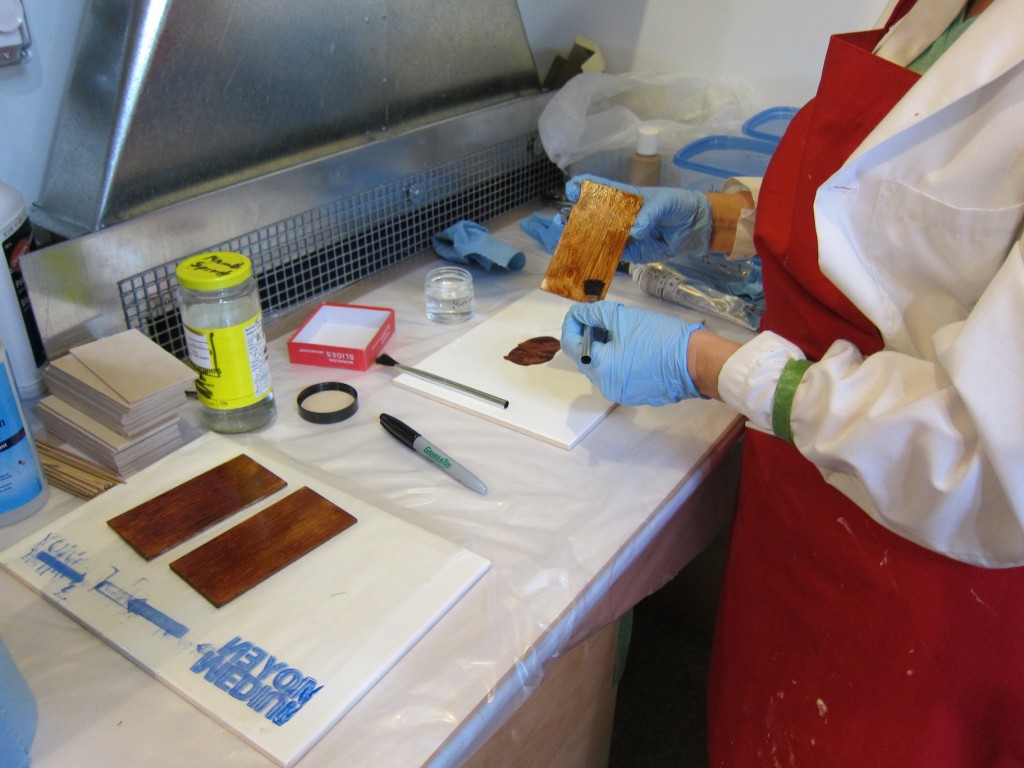
Other sources of dust are the urushi itself, the brushes and the object. For this I filtered the urushi with paper especially made for this purpose. A suitable amount of urushi, about a teaspoon for my purpose, was placed on the paper. The paper was then folded over and then twisted until the urushi was squeezed out into a clean glass bowl. This does remove any particles that may be found in the urushi, however it also added air bubbles. Prior to application the brush must be cleaned. I was using an urushi brush that I purchased in Japan and had last used several years ago. The brushes are stored with a non-drying oil(often rape seed ) on the bristles so any remaining urushi after the last use and cleaning will not dry. The oil must be removed with solvent. This means several application of solvent and the use of a bone spatula to work through the bristles to ensure all the oil is removed. To test if there is still oil on the brush, solvent is drawn out on across the ceramic surface, allowed to evaporate so one can observe if there is any oil remaining. Next step is to work the urushi into the brush and test the result on the ceramic again. Once the urushi flows out evenly without dust the brush is ready to be used. Finally just before application the board was given one final wipe with solvent and allowed to evaporate before painting out the urushi with a smooth even strike.
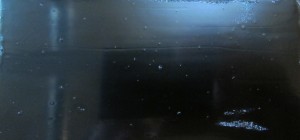
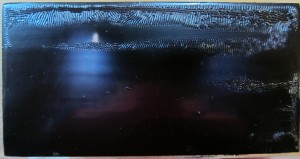
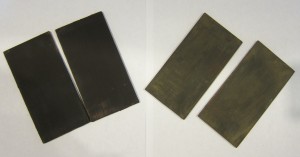
I began with the black urushi processed in Japan from Chinese urushi. With all these measures I did not have a problem with dust particles but a multitude of bubbles instead. I tried to remove them by brushing them out but every brush stroke brought an increase in the number of bubbles. After application of the urushi the panel is set aside to allow the brush strokes to level out so I had hoped that they would break. In this case some of the bubbles disappeared but most remained. I noticed that there were fewer bubbles if the urushi was applied fairly thickly. Unfortunately this was not the answer. Wrinkles were the result on drying.
So there I was with six boards covered in bubbles and wrinkles. I sent out a call for help. Stay tuned for the next episode.
If any of you have suggestions I certainly would like to hear from you.
Post 7 Asian Lacquer Samples Boards – Sealing the Ground
With the grinding of the ground layers complete all that is left to do before beginning the finish coats is to seal the ground. There are two options. One way is to apply raw urushi, let it soak in, and then wipe off the excess. The second is to apply it as a brush coating and followed by drying in the furo. With this method the ground is sealed but you also have a layer that can be abraded smooth before beginning the finish coats.
The raw urushi has relatively low viscosity so this layer was easy to apply by brush and leveled quite nicely. It dried to a glossy dark brown surface. Before applying the finishing coats the sealing layer must be abraded until smooth. I used hoo sumo charcoal from Japan. I will describe more about grinding layers with charcoal in a later post.
Asian lacquer sample boards – Post 6 “Urushi work is…”
In 1995 I had pleasure of a brief stay at Murose, Kazumi’s studio in Tokyo to learn the basics of lacquer work. It was a very intensive time and several colleagues each undertook parts of my education. I had brought with me sample boards I had made on my own that had several problems. They gathered around to look at them.
The pronouncement, “Not flat Marianne san.”
So began my lesson on grinding.
I learned about the artificial stones for the ground layers and which charcoal to use for different stages of the finish layers. I set to work. After hours of grinding to fix my boards, one of my colleagues who was also grinding another project leapt up and said” Urushi is… is….”. Then she ran for her dictionary. Flipping through the pages she announced. “Urushi work is drudgery.” We all laughed.
I whole-heartedly agree with her. Of all the tasks involved in making these boards, grinding, abrading, leveling, polishing, smoothing, buffing, and rubbing takes the most time. To simply level and smooth the ground layers is taking about fifteen minutes per small board. I consider that quite fast.
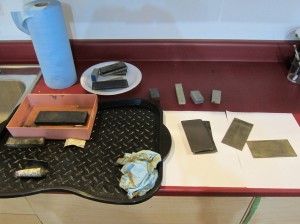
I set up my workstation next to the sink. I used a boot tray to contain the mess. Here is the process I am following.
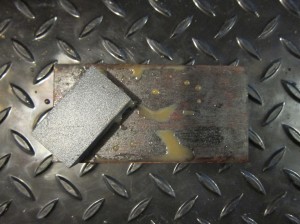
1.To begin I am using 220 grit wet sandpaper wrapped around a polishing stone. I found it was better to start with the disposable sandpaper to quickly remove rough bits and high ridges. I had started with my 400 stone but any sharp raised bits caused scratches in the stone.
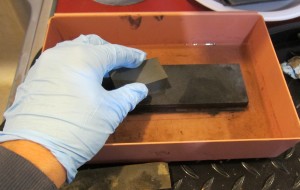
2. I levelled the board by grinding with Japanese ‘400’ crystal stone. This could also be done with a 320 grade wet sandpaper.
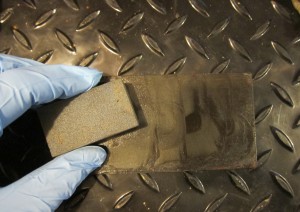
3. I wiped the brown slurry off the surface to see the progress.
4. If ridges had been removed I proceeded to 1000 grade stone. If if needed more levelling I switched to a 600 stone to continue with more control.
5. Wiping surface and grinding was repeated until the surface was smooth and level.
6. Boards were then washed to remove all loose material.
7. Boards dried.
8. Boards wiped with a damp cloth to remove final traces of loose dust.
9. Boards dried.
Other tips.
* Your forearm should be level to the surface of the board for even pressure. I tend to use too much force but it is better to let the abrasives do the work both for your arm and the board.
* Grind in alternating small and large circles and proceed over the whole surface to ensure even coverage. Grinding in straight lines down the length of the board tends to be uneven, resulting in a ‘not flat’ surface.
* Use small stones so you can stay within the size of the board. You want to avoid overworking the edges to prevent sanding through to the wood.
* If you get scratches in your polishing stones you can use a whetstone to remove them.
Asian Lacquer Sample Boards – Post 5 Ground Layers
Ground layers
The universal purpose of a ground layer in lacquer objects is to provide a smooth surface for the lacquer on top. Despite the fact that ground layers are not seen they have a great impact on the quality of the final product. Every flaw is transmitted to the top surface. The quality of materials will affect both the initial product and the longevity. Many objects that we have in museums have been valued since their production and were made with good materials. Perhaps this has distorted our perception that most Asian lacquer is of the highest quality. The truth is that the ordinary soup bowls are seldom found in western museums because they were not meant to last.
Ground layers for Asian lacquer objects vary with local materials. Some contain lacquer as the binder and many do not. Binding materials found in ground layers across Asia can be made using any of the following materials: urushi, thitsi, laccol lacquer, various animal hide glues, persimmon juice, blood, starches and several different oils. Despite the fact that I am trying create lacquer surfaces that are quite diverse, I would like to standardize the ground layers. The watermarks I wish to study involve the surface layers so it is not necessary to recreate all the different types of ground materials used. I have decided to make the basic ground layer using Asian lacquer of the same type that the top layers will be. For example I will use an urushi binder for the boards that will be finished with urushi and laccol lacquer for the laccol boards.
Application
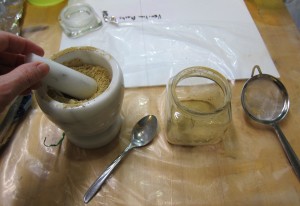
For these first sets of boards I used raw lacquer from China, which was packaged in Japan, and tonoko purchased in Tokyo. The beige coloured tonoko has been ground to a fine powder but over time it tends to form lumps. This meant I had to use a mortar and pestle to break down the lumps and then sieve out any larger particles before use.
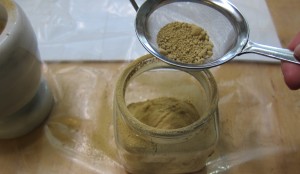
I have a large glossy ceramic tile for working with lacquer but a sheet of glass works as well. The tonoko and raw lacquer were put out in roughly equal amounts and mixed together with a Japanese wooden spatula. It is hard to say the exact amount as I add additional amounts of either ingredient until the mixture has the consistency of a butter cream icing. This is a messy job. One has to work at it until any fine lumps for tonoko are dissolved.
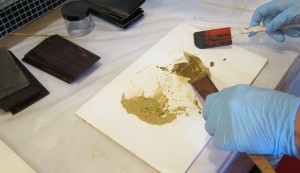
To continue the cake decorating analogy, I applied it to the surface of the board with the spatula in the same manner. Did I say this was messy? The sabi seems to end up everywhere in addition to the panel. I hope I will improve over time. After application to one side of the 6 boards I put them in the furo to dry.
Asian lacquer – Post 4 Opening the urushi
Getting out the urushi.
I have to admit I was a little nervous about actually beginning to work with urushi again. In fact I could be considered almost obsessive about not getting a rash. My first experience with urushiol was not associated with Asian lacquer but as a teenager on a beach. I was walking with a boy I knew along the edge of Wasaga beach, 14 kilometer stretch of white sand, famous for being the takeoff point for Canada’s first flight over the Atlantic. A lesser-known fact about the beach is that it provides ideal growing conditions for poison ivy, an urushiol producing plant related to Toxicodendron Vernicifluum. After walking a short stretch I recognized the ‘leaves of three let it be’ plant. The boy disagreed and to prove a point picked me up and dumped me in it. You can guess who was right. Since I was wearing short shorts and a halter-top I got a massive rash with weeping blisters on my legs and a lumpy rash on my back. It took three weeks of misery to heal.
Fast forward 20 years to my first experience working with urushi. Although I used gloves and thought I was careful to keep it contained I still managed to get itching rough patches on my forearms. Many people have told me that if you persist in working with urushi you will develop immunity. I admit any rashes I have had since were mild, however, when I have been unprotected I have reacted. Perhaps it is the memories of the first exposure that makes me take the precautions that I do. Here are my tips for working with urushi.
Have a separate work area.
Have urushi work clothes, and keep them separate.
Wear gloves and change them frequently.
Use Ivy Block for unprotected areas of skin or under gloves.
Clean up urushi with solvents.
Dry all urushi tools, and trash such as cloths, gloves etc. before storage or disposal. I built two drying boxes for this reason, one for the boards and one for the trash.
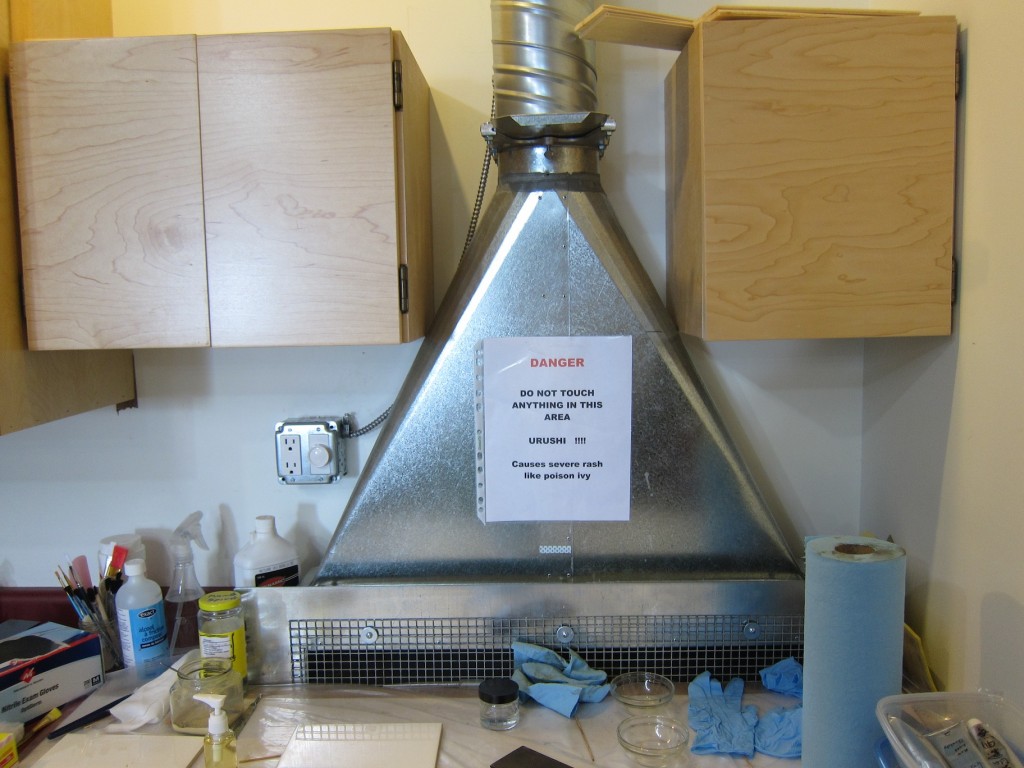
Post warning signs for others.
Application of urushi to seal wood.
I was taught to use a mixture of kijiro and kijome, the Japanese terms for transparent processed lacquer and raw lacquer to seal the wood. I mixed them together in a ratio of 3:1 in a small glass bowl. It was brushed on using nylon disposable brushes from the dollar store to save time in cleaning. I allowed five to ten minutes for the urushi mixture to soak into the wood. When several areas had become dull I then applied a second coat. It was again allowed to penetrate the wood. Then the excess urushi was wiped off using a lint free cotton cloth. The surface was even and dull. The process was repeated on the second side. Because both sides need to dry I laid the boards on horizontal swab sticks to lift them off the shelf in the furo.
Asian Lacquer – Post 3 Standards and Substrate
Criteria for the Sample Boards
For my study of watermarks I wanted to create surface that are commonly found on museum objects. Recent improvement in the method of analyzing Asian lacquer using pyrolysis-gas chromatography/mass spectrometry (Py-GC/MS) has yielded very interesting results. The materials of Asian lacquer coatings are far more complex that previously understood. Not only are lacquer object made with urushiol but many are based on laccol. In addition other materials such as tung oil, perilla oil and cedar oil are commonly found. This new information makes my job of imitating the surface more difficult.
I would love to study all the variations but I had to limit the number of variations and streamline the process. The procedure I have decided to follow is a simplified version of the methods I was taught in Japan about 20 years ago. The processes I will be using are more or less the same but the number of layers vastly reduced. As I will be making over 50 boards in total I do not have time to apply all the layers that would be found in a high quality piece of Japanese lacquerware. In addition, the watermarks I wish to study usually only involve the surface layers.
The stratigraphy will be as follows:
Wooden substrate
Wood sealed both sides with a mixture of transparent and raw lacquer
Ground layer of raw lacquer mixed with ground clay applied to both sides
Ground layer abraded smooth on both sides
Application of raw lacquer to seal ground on both sides
Abrading smooth raw lacquer layer on the side to be finished
Application of first finish coat
Polish
Application of second finish coat
Polish
Application of final coat
Some samples will have a final polish
I will be making six boards of each type of lacquer I wish to study. Originally I had hoped to keep it to three sets but I think the different Asian lacquers and additional ingredients have a bearing on aging characteristic and the susceptibility to watermarks. My current plan is to make the following sets of boards: Chinese transparent urushi processed in Japan, black Chinese urushi processed in Japan, black Japanese urushi, Taiwan transparent laccol lacquer, Taiwan black laccol lacquer, laccol lacquer with cedar oil and tung oil, Black laccol lacquer with cedar oil and tung oil and finally black Vietnamese lacquer. I will give more information on why I have chosen these and their differences.
If I have time I will also make one set of iron oxide red boards and another set with cinnabar, both made with Chinese urushi. I would also like to make two with different ground layers, one to represent high quality Japanese lacquer that has cloth applied and multiple urushi ground layers and a second set to represent Chinese export lacquer with a glue and oil based ground. This might be too much, we’ll see how it goes.
Substrate
I have chosen to make the boards using 5ply birch plywood made in Finland. This plywood is only 3mm thick so that it is both light weight and dimensionally stable. The samples will be exposed to varying humidity cycle during artificial aging so I prefer a substrate that will not warp.
The plywood comes in sheet 25inches by 25 inches. I cut the boards on a table saw to a size of 6cmx14cm to fit in the weatherometer. The sample boards that may turn out to be thicker than 4mm are required to be shorter and were cut to 6X12cm. This size turns out to also be very convenient size to work with. I can fit a total of 36 boards on my furo at once but I doubt I will have that many drying on any one day.
For the next post I will actually get the urushi out.
Asian lacquer sample boards: Post 2 – setting up the workshop
There are a number of factors I took into consideration in setting up my workshop for Asian lacquer. Isolation, ventilation, and control of the relative humidity being the ones I was most concerned about.
Isolation
Isolation may seem a bit odd but there are two factors within this category the first being control of dust and the second control of access to the Asian lacquer work area. Dust is a real nuisance when working with Asian lacquer. Because it dries slowly it is easy for dust to land on the surface and be fixed to it thus marring the finish. I’ll write more about dust control when I get to the finishing layers.
Isolating your work area and controlling access to it is also a good idea because of the toxicity of the material. Asian lacquer, from the Anacard family of plants, in its liquid state is well known for its health hazards. The main component of lacquer, urushiol, laccol or thitsi can cause a severe skin reaction in many people if it comes in contact with skin and is not washed off immediately. The effects of urushiol have been studied but it is reported that laccol and thitsi also cause a reaction to a lesser degree. The urushiol chemically reacts with proteins in the skin, which is followed by an immune response in many individuals causing a rash with blisters. The severity of the reaction depends on the individual. While some people seem to have a natural immunity and others can build up immunity, a few people will become increasingly sensitive to the urushiol over time. Severe allergic reactions are not unknown.
For individuals uncertain of their reaction, extra precautions are advised when working with lacquer. First the Asian lacquer work area should be kept separate from the rest of the workshop. It is easy for visitors to be unintentionally exposed. Although I cannot have a separate room for lacquer work I have a designated area for lacquer work and warning signs posted.
It is recommended that disposable latex, vinyl or nitrile gloves be worn. I use Ivy Block on any exposed areas of skin such as my forearms and face. It is amazing how many times we unintentionally touch our faces during the day. Ivy block was developed by the US forestry service. It was designed to react with the urushiol thus neutralizing it and preventing it from coming in contact with the skin. Although I used to get rashes when I first worked with urushi, I have not had a reaction for years. I do not know if this is a result of being careful to avoid exposure, using Ivy block or just developing a natural immunity.
One final note on this subject is to clarify the mistaken idea that lacquer is still toxic after drying. This is not so. Once polymerized it is no longer toxic. Even when lacquer breaks down with exposure to light, the degradation products are not toxic.
Ventilation
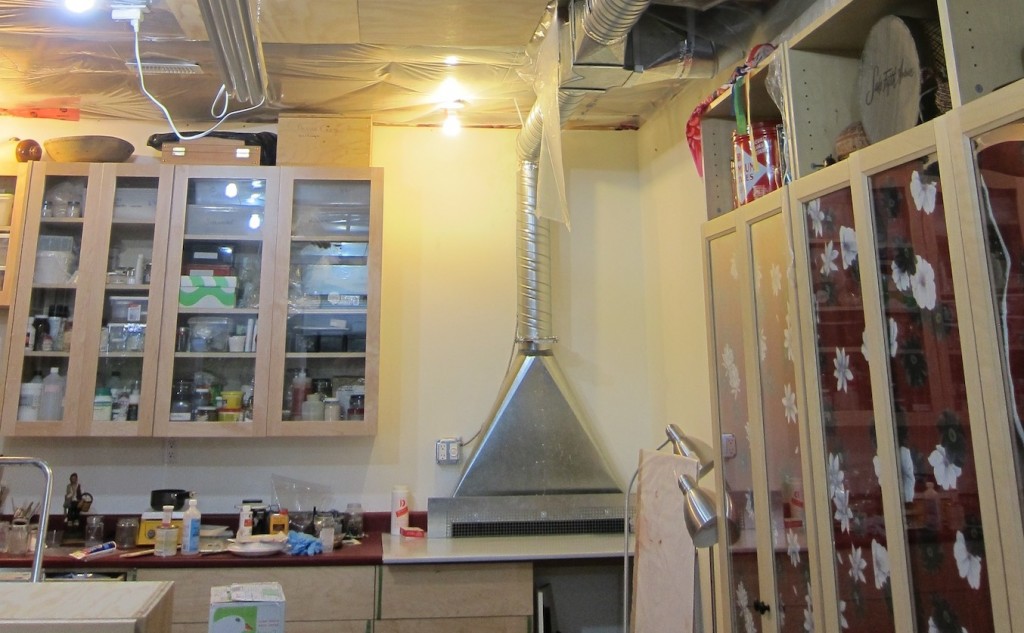
Although one can work with urushi without ventilation solvents are required for clean up. I prefer to work with a ventilated bench top and have my furo for drying the lacquer within a short distance. It keeps the lacquer in one area and minimizes dust exposure.
My ventilation system is based on the bench top models developed at the Canadian Conservation Institute. I had a local sheet metal company (Pike Sheet Metal) in Gibsons, BC, build the bench top capture device and a ventilation contractor install the system. The variable speed blower is located outside the house to minimize noise. This system was very inexpensive and allows you to work without having to bury your head in a fume hood. Efficient ventilation is provided in an area about 40 inches wide and 15 inches high with a depth of 20 inches from front to back of the work area. This is space is perfect for me to make sample boards whether they are European or Asian lacquer.
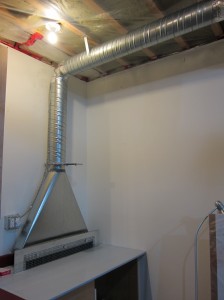
Control of Relative Humidity and Making a Furo
The main purpose of a drying cabinet is to provide a humid, dust-free atmosphere that promotes the hardening of the lacquer. Asian lacquer is best dried between 70 and 85% relative humidity. A suitable balance must be achieved between temperature and humidity. If the humidity is too high the lacquer might dry too quickly on the surface and not underneath. Evidence of this would be seen in a wrinkled surface. While slow drying is desirable to achieve a glossy surface, there should be enough humidity to provide for complete polymerization of the lacquer. At least 50% is required for drying.
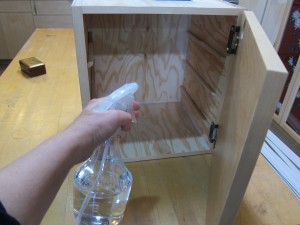
Another problem, which can be encountered during hardening, is that of condensation. Should the temperature drop during drying, condensation in the form of small water droplets on the wet lacquer will ruin the surface. The small pale marks resulting cannot be wiped off but instead must be ground away and the whole surface lacquered again. With so many factors to consider it may be surprising to find that most drying cabinets are simply unvarnished wood. The interior of the cabinet is sprayed with water daily. The wood absorbs the water and slowly releases it.
Construction
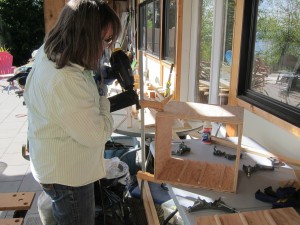
The cabinets that I made for this project are constructed of five-layer douglas fir plywood joined using a nail gun and finishing nails. I bought the plywood but just about everything else I had in the workshop already. Rails to hold the shelves were made from 1 cm, quarter round. For the shelves I used left over tongue and groove boards 8cm x 5mm thick. The boards are used individually with gaps between to allow air to circulate and they are not attached so they can be reconfigured to accommodate different sized objects. For the front doors I reused two that had been discarded, because as they were the wrong size for another set of cabinets. This had the added benefit of matching the other lab cabinets. Purely for esthetic reasons I applied maple veneer to the visible surface of the exterior plywood.
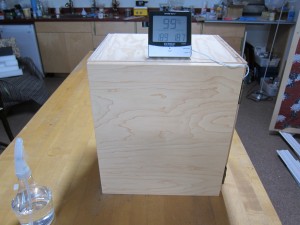
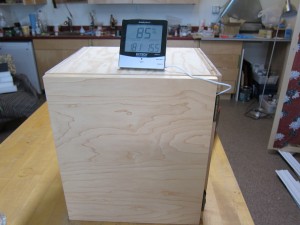
After the cabinets were constructed I conducted tests of the interior relative humidity levels after spraying with distilled water. Measurements show that immediately after spraying, the relative humidity in the cabinet is about 99%, but if the door is left open for an hour it will drop to 85%. Over 24 hours the RH drops slowly to about 75%. The relative humidity remains above 70% for about two days. At this time of year the humidity in the lab is about 65%. This is ideal for my purposes.
The next instalment will outline the project and describe the preparation of the substrate.
Asian lacquer sample boards – Introduction
Welcome to my blog on Asian lacquer. Over the next few weeks you will be able to follow my progress on making sample boards using several different types of Asian lacquer. I am undertaking this project because in January 2014 I will be begin six months as a guest scholar at the Getty Conservation Institute to study the discolouration of Asian lacquer.
For my experiments into water marks and thermochromatic changes in Asian lacquer I need to make sample boards that represent simple versions of lacquered objects commonly found in western museums. Several sets of small undecorated boards will be created to represent Japanese lacquer, Chinese lacquer processed in Japan, Chinese export lacquer and Vietnamese lacquer. As the project unfolds I will explain more about the differences in these types of Asian lacquer.
After I have completed the boards, several months will be allowed for curing the lacquer. Later just prior to my time in residence at the GCI they will be artificially aged by exposure to ultraviolet light or daylight in conjunction with various relative humidity cycles. But that is down the road a bit, now I have to get started on the production.
Although I have lots of theoretical information, it has been a while since I actually worked with Asian lacquer and I consider myself an unskilled amateur. There are quite a few videos on the Internet that demonstrate the techniques of production. They make it look easy but like everything it takes a lot of practice to become competent. You will get to discover all the difficulties of working with this amazing material at the same time as I do. I am looking forward to discovering the difference in the types of Asian lacquer and their working properties.
The blog will be posted at irregular intervals from a few days to a couple of weeks so be sure to check back once and a while to see the progress. Next post will on setting up your work space and building a furo.
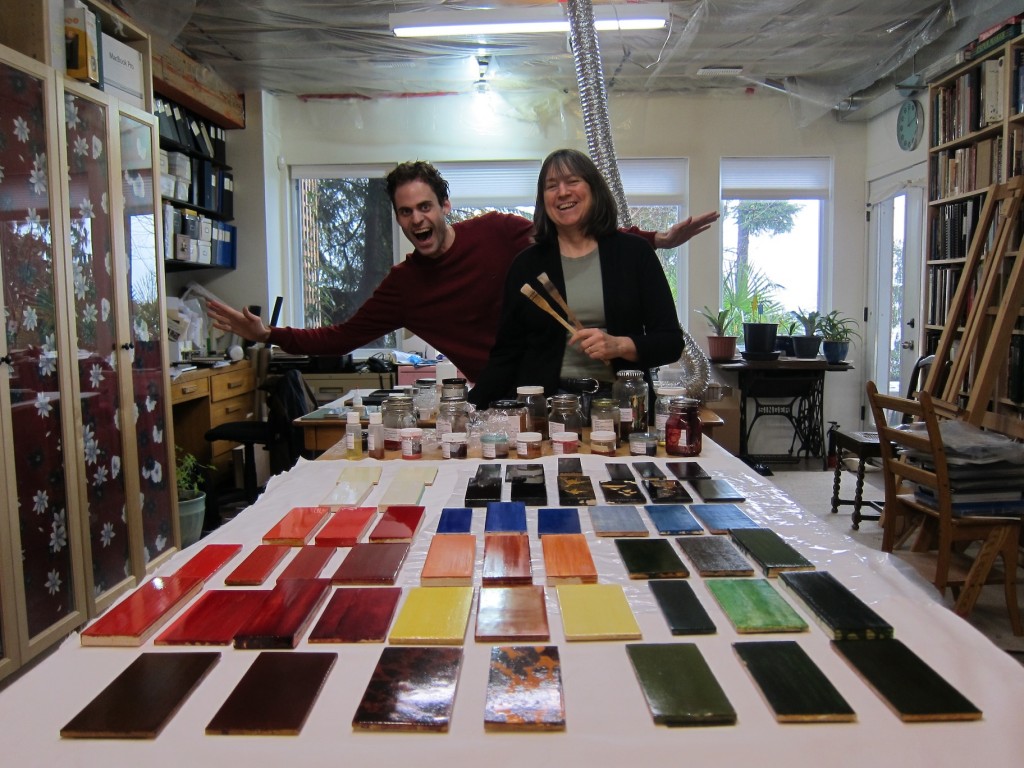
Conclusions on Recreating Western Lacquer Recipes
Marianne’s Comments
It has been a hectic but fun filled two weeks. Now we come to the time to look at what was accomplished and take stock. For me the exercise of making these panels again and again is interesting because the results can vary. Some panels appear very different than earlier versions and others the same. Just as the availability of materials in the 17th century may have affected the varnishes, the same is true today.
This no doubt affects the results. Another aspect that fascinates me is the comparison of the new panels with ones I produced over twenty years ago. How well they have the survived. Below, after Jonas’s conclusions, I will outline many of the panels made and compare then to past versions.
Jonas’s Conclusions
The results of this short but intensive research are twofold. There is on the one hand the physical application of a lacquer system on a substrate and the other hand the interpretation of the historic literature that were used within this study.
It is interesting to explore whether the authors of these historic publications knew about their work. As we mentioned before there are recipes in the Stalker and Parker book that were directly copied from the W. Salmon book. Perhaps their specialisation in the field of lacquer or painting of these authors is questionable. William Salmon was a person who was in his time (17th century), known for the publication of numerous medical books. It has been questioned whether he wrote them himself or that he may had some kind of 17th century ghost-writers to publish all these books. Also the expertise of the Stalker and Parker is uncertain. The target group of their book can be described as ladies who had time to create lacquered furniture and other objects. For this reason it can be described as a 17th century hobby book rather than a technical reference. This is confirmed by its literary quality, which makes it nice to read and accessible to those who are interested in this subject. If we compare this book for example to the R. Dossie book, we see that Dossie describes details on how to create a varnish and sometimes the way of application in a direct manner. It is certainly written for artists or people who are professionally active in this field.
Final Conclusions On Recreating Western Lacquer Recipes
On the basis of our research of the last two weeks concerning “recreating western lacquer using historic recipes” we will provide in a short conclusion of each varnish or lacquer we reconstructed. Within these conclusions the material properties and the way of application will be central.
Black lacquer (Stalker and Parker)
Jonas’s Comments
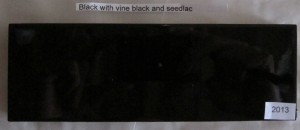
The first layers by which the substrate was covered with an even black colour worked out very well. Of all the lacquer recipes we tested, this lacquer had the best covering properties. In this process the pigment was easily mixed with the seedlac, making a paint like mixture. The flow of the lacquer was also very good, leaving no visible brushstrokes. In the following layers the concentration of pigment in the lacquer slightly decreased. This created translucency and the gloss. The middle layers consisted of pigment mixed in a seedlac/Venetian turpentine mixture, which resulted in a more mat surface. Also the flow was not as good. To observe the difference over the long term we made one panel with seedlac middle layers and one with Venetian turpentine/seedlac middle layers. I think that the one Venetian turpentine in it might degrade to a lesser degree than the one with seedlac alone. The final stage in the procedure was to apply pure seedlac, reaching the highest gloss. The recipe also describes polishing the surface after the last seedlac layers (most of the recipes do). In this short time period we could not do the polishing. When the panels are sufficiently dry the final polishing will be done.
Marianne’s Comments
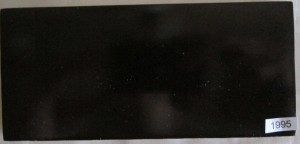
The black lacquer panels that I made in the 1990’s are still in quite good condition. On some panels that I made(not pictured here) there are cracks in the surface that correspond to the grain of the wood in the substrate. Those that were made on poor quality wood show the most damage. Those that were done on stable plywood have remained unchanged.
Regarding the addition to Venetian turpentine to the middle layers, in my experience adding different materials between other layers will cause tension in the overall product, which may cause problems in the future though none have been observed to date.
Red lacquer (Stalker and Parker)
Jonas’s Comments
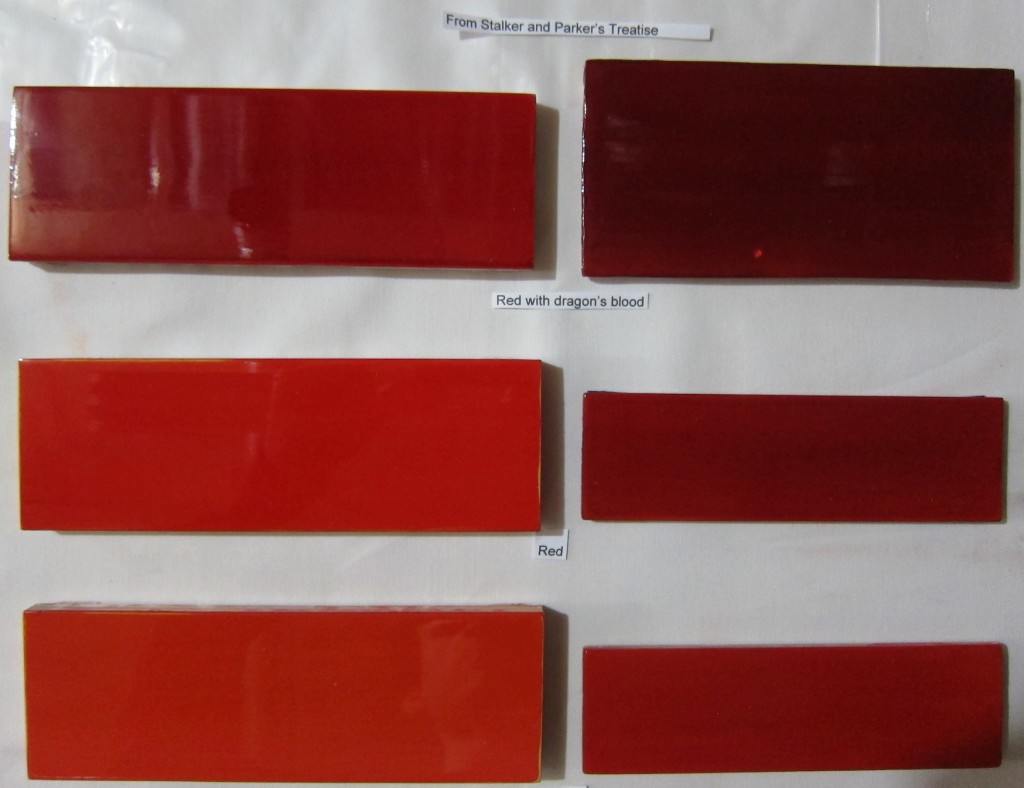
This recipe contains directions of three different red coloured lacquers; the common usual red, the deep dark red and the pale red. For the first two, the first layers were the same (vermillion mixed with seedlac). The mixing of the pigment into the seedlac went quit well, however, if allowed to sit, the pigment will fall to the bottom. It has to be stirred before use. The viscosity is lower than the first layer lacquer of the black lacquer. The covering power of the red mixture is also lower than the black lacquer. For this reason at least two or three layers are needed to cover the substrate evenly.
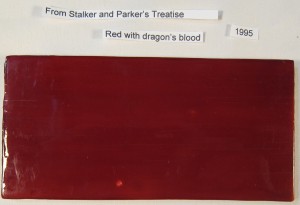
For the deep dark red more layers of seedlac mixed with dragon’s blood were applied to create a dark red colour. The dragon’s blood intensified the red colour of the substrate.
For the pale red, lead white had to be added to the vermillion mixture create to a light red colour. For all these different red varnishes the flow capacity was good, leaving no visible brushstrokes. The last layers of these sample boards consisted of pure seedlac making a gloss comparable to the black panels.
Marianne’s Comments
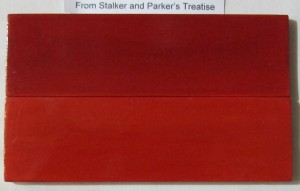
My past experience has been consistent with Jonas’s work. Vermilion/cinnabar, a mercury-based pigment is heavy and does sink, but as layers are built up on the panel the colour is even. Another problem that I have noted is in the process of sanding back the layers. The colour of the vermilion will become lighter if it is abraded directly. At one point to demonstrate this phenomenon I made two panels with exactly the same number of layers, the only difference being the direct abrasion of the vermilion pigment. In the photograph below, the vermilion pigment layer on the lower panel was sanded directly, however on the upper panel the pigment layer was protected with clear seedlac prior to sanding. Since this pigment is toxic I insist that others working in the lab apply at least two layers of clear seedlac before abrading to smooth the panel. Panels made in the past may have been brighter as it is unlikely they applied these health and safety measures.
The seedlac and vermilion panels made in 1995 have aged very well, with no cracks or delaminating observed. However, the panels with dragon’s blood/ seedlac layer on the surface now have a network of large cracks forming. Unfortunately it does not show well in these photographs and is only seen on the edges of the panel below.
White lacquer (Stalker and Parker)
Jonas’s Comments
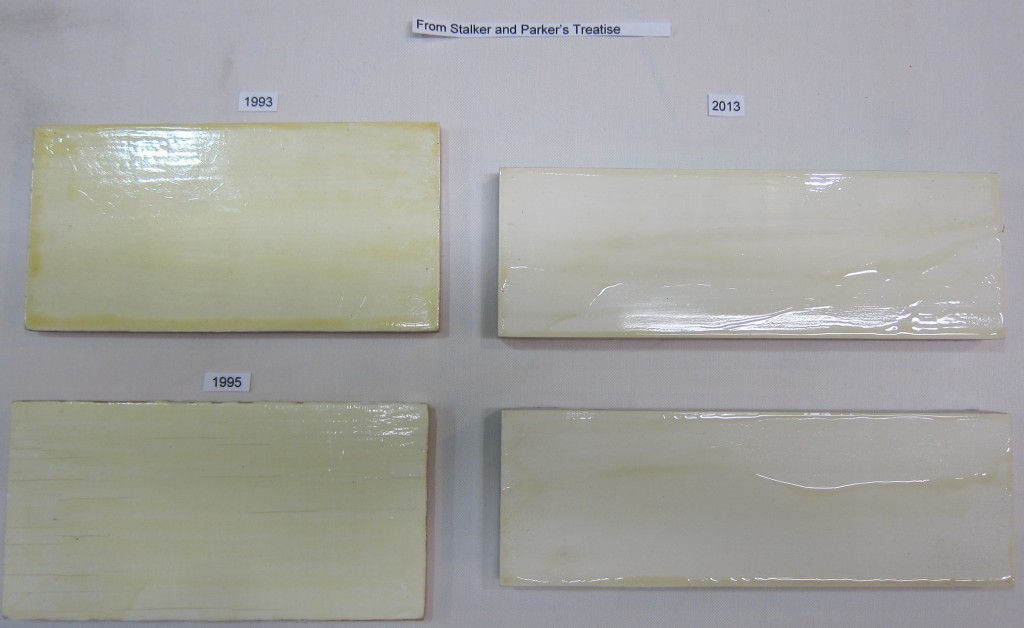
In the first step in mixing the lead white into the isinglass size we had problems because the viscosity was to high by which a good dispersion was not possible. We warmed the isinglass longer to lower the viscosity in order to mix the pigment better. The covering however, and flow was still not as good as with the black and the red and it took several coats to cover the panel well. The following layers of wheat starch worked out very well. The viscosity could be adapted to our needs by adding more water. By this reason the application worked out very well. For the last layers the panel had to be covered with several coats of the S&P “best white varnish”. The fist layers were no problem (covered very well, good viscosity, good flow, high gloss). Then the next the application of the following layer gave a really bad result. We think by some kind of tension the lacquer is stretched towards the middle and the sides of the panel, leaving accumulations of lacquer. Also the sanding worked out really bad. The sanding paper was in no time filled, making scratches on the surface.
Marianne’s Comments
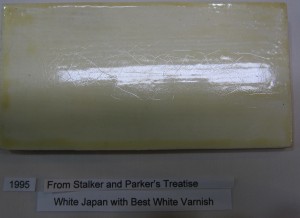
In addition to the problems Jonas has outlined above one can see from the second photograph that it also does not age well. It has yellowed considerably in 18 years. There is a network of both large and fine cracks over the surface. The major cracks started to appear within six months and continued to deepen over the years. Now I can see there is a fine network of small cracks, which gives the surface, a slightly dull appearance. Overall this is not a varnish or method that I would recommend. If there were ever any objects made using this formulation it is doubtful that they would still exist today.
Blue lacquer (Stalker and Parker)
Jonas’s Comments
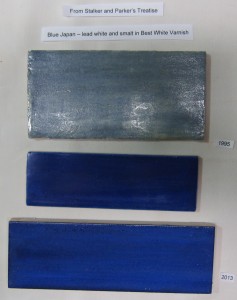
In this recipe the lead white was mixed with the gum water and the smalt with the Isinglass size before the two mixtures were put together. The smalt in the mixture was a problem because the particles directly sank to the bottom. Before each application it had to be stirred and applied quickly. The particles of the smalt were very large, which were visible by eye and left a mat surface.
Stalker and Parker claim this mixture should be the viscosity of “common paint” but I found it was much lower. Also because the hiding power was low, several layers had to be applied. The application of the isinglass worked out very well but the next layers of the S&P best white varnish gave a really poor result, similar to the white sample boards.
Marianne’s Comments
In addition to the above I will added that the colour of the final result varied with the proportion of lead white to smalt. Also not only does the lead white smalt mixture separate in the jar but as it dries it can separate on the panel. Since the lead white is at the top one can have pale looking panels. The result is much better is when there is little lead white in the mixture.
Because the varnish used on top the blue isinglass/gum water mixture is S&P’s best White Varnish the surface has yellowed and cracks have formed. The yellowing is not as noticeable on these blue panels.
Red varnish (William Salmon)
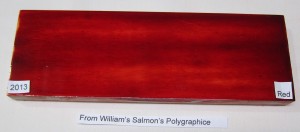
Jonas’s Comments
After the lacquer was prepared the consistency too viscous. For this reason an even application was not possible. To lower the thickness alcohol was added till until it resulted in a good consistency. The covering power was not as good as with the S&P red lacquer however the flow was very good. Because of the blood red colour and the uneven application it would make a perfect varnish for the imitation of tortoise shell.
Marianne’s Comments
The recipe for this varnish was not found in the japanning section of William Salmon’s book but the general varnish section. It’s intended use was not described. We thought we would see if it could be applicable for western lacquer.
It is tempting to take short cuts when one reads that this varnish must be heated for a week before use. Before heating this varnish had a watery consistency that would have not formed a good film. Just the day before use the viscosity increased rapidly. This was not due to evaporation, as the volume remained the same. As for the application, we did not succeed in applying it evenly, however I think with better brushes and practice it would be possible. It could be used as a red transparent varnish to enhance other colours or directly on wood.
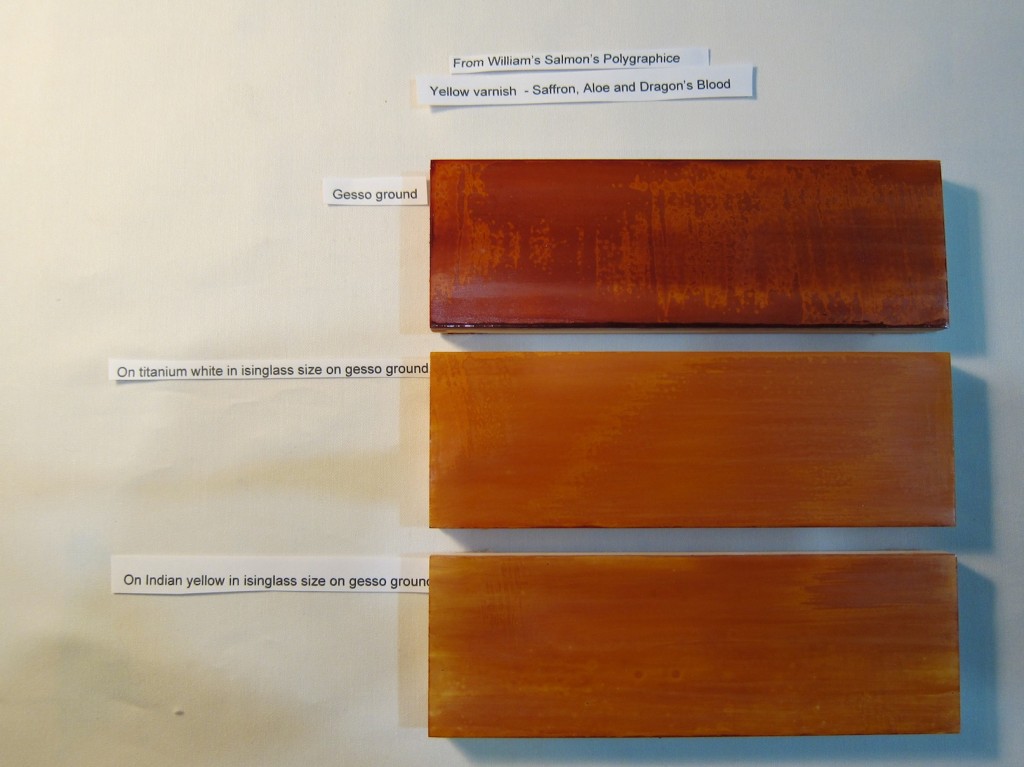
Yellow varnish (William Salmon)
Jonas’s Comments
The viscosity of this varnish was after preparation very low; it had a watery consistency.
In the first layers there is indeed a yellow colour visible, but after a view layers have been applied the colour will turn browner. The varnish acts rather like dye then a film forming lacquer. It is only possible to create a weak film by adding at least five layers of varnish. The colour will darken also this way.
Marianne Comment’s
This varnish was also found the general varnish section of Polygraphice. It is clear from is handling properties that it is not suit to create lacquer. It could be used to enhance another colour. It is doubtful that is would be used as a film on its own.
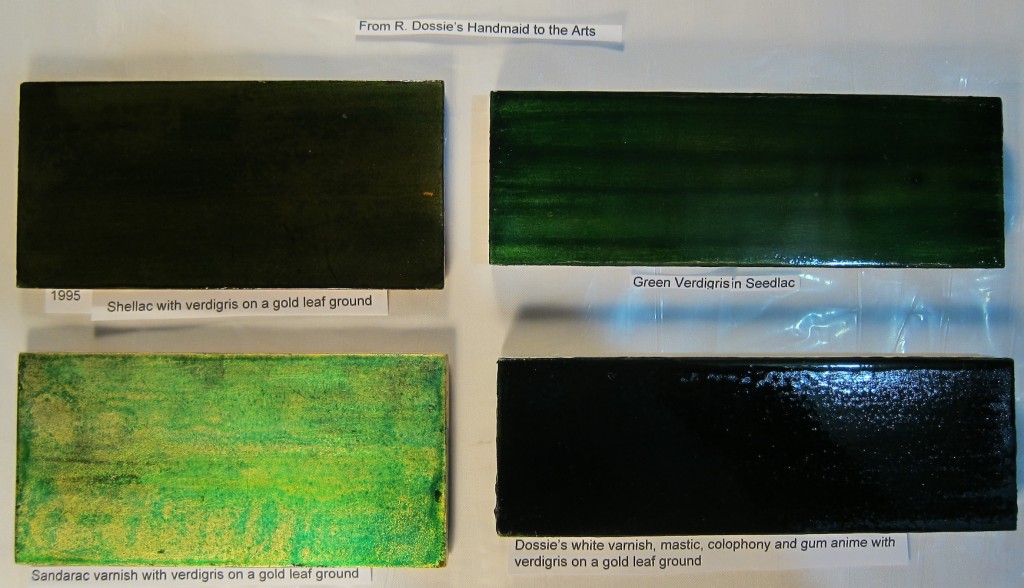
Green Lacquer (Robert Dossie)
Jonas’s Comments
We chose for this lacquer to grind the pigment into the lacquer varnish to reduce the particle size and increase the covering power. At least three layers were needed to cover the surface homogeneously. But grinding the pigment into the varnish had a better result when we compared it to a panel Marianne had made earlier. For this colour I made two panels; one with seedlac and the other one with Dossie’s white lacquer. The viscosity of the white lacquer is somewhat thicker than the seedlac but this did not result in a big difference in the way of application. The seedlac darkens the colour more than the white varnish on the other hand it dries faster. The reason the white varnish dries so slowly is because of the high concentration of turpentine in its mixture. I expect the white varnish will probably degrade slower because of the softer resins used in the varnish.
Marianne’s Comments
The panels that Jonas produced were much better than the ones I have made in the past. In a sandarac based varnish used instead of Dossie white varnish I had difficultly getting the coarse verdrigris pigment to disperse evenly. Also the shellac I used was much darker than the seedlac used for this project. In ordinary room light the panel I made is an unpleasant brown while the recent one is a pleasing green colour. Both of the panels made in the 1990’s have changed very little over time.
Thank you for joining us
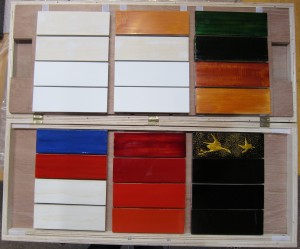
Below are Jonas’s panels packed for the trip back to Amsterdam. As Jonas intends to continue making more panels I will be looking forward to seeing the results.
Stay tuned to this Channel.
My next project to be posted here in the coming months will be the production of Asian lacquer sample boards. The materials and methods used will be based on recent analysis of Asian lacquer formulations. I intend to create sample boards of surfaces commonly found in western museums so there will be some panels made following Japanese methods of both high and low quality as well as Chinese export lacquer.
Marianne Webb

