
Jonas and Marianne with sample boards both old and new.
Marianne’s Comments
It has been a hectic but fun filled two weeks. Now we come to the time to look at what was accomplished and take stock. For me the exercise of making these panels again and again is interesting because the results can vary. Some panels appear very different than earlier versions and others the same. Just as the availability of materials in the 17th century may have affected the varnishes, the same is true today.
This no doubt affects the results. Another aspect that fascinates me is the comparison of the new panels with ones I produced over twenty years ago. How well they have the survived. Below, after Jonas’s conclusions, I will outline many of the panels made and compare then to past versions.
Jonas’s Conclusions
The results of this short but intensive research are twofold. There is on the one hand the physical application of a lacquer system on a substrate and the other hand the interpretation of the historic literature that were used within this study.
It is interesting to explore whether the authors of these historic publications knew about their work. As we mentioned before there are recipes in the Stalker and Parker book that were directly copied from the W. Salmon book. Perhaps their specialisation in the field of lacquer or painting of these authors is questionable. William Salmon was a person who was in his time (17th century), known for the publication of numerous medical books. It has been questioned whether he wrote them himself or that he may had some kind of 17th century ghost-writers to publish all these books. Also the expertise of the Stalker and Parker is uncertain. The target group of their book can be described as ladies who had time to create lacquered furniture and other objects. For this reason it can be described as a 17th century hobby book rather than a technical reference. This is confirmed by its literary quality, which makes it nice to read and accessible to those who are interested in this subject. If we compare this book for example to the R. Dossie book, we see that Dossie describes details on how to create a varnish and sometimes the way of application in a direct manner. It is certainly written for artists or people who are professionally active in this field.
Final Conclusions On Recreating Western Lacquer Recipes
On the basis of our research of the last two weeks concerning “recreating western lacquer using historic recipes” we will provide in a short conclusion of each varnish or lacquer we reconstructed. Within these conclusions the material properties and the way of application will be central.
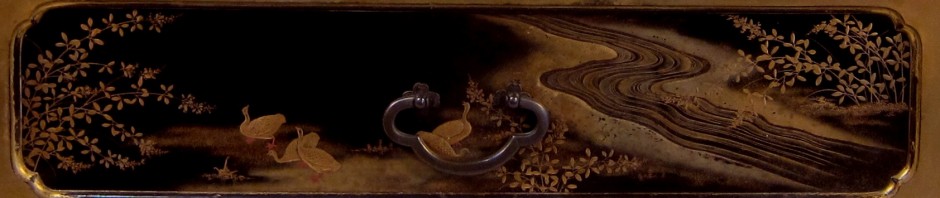
Black lacquer (Stalker and Parker)
Jonas’s Comments
The first layers by which the substrate was covered with an even black colour worked out very well. Of all the lacquer recipes we tested, this lacquer had the best covering properties. In this process the pigment was easily mixed with the seedlac, making a paint like mixture. The flow of the lacquer was also very good, leaving no visible brushstrokes. In the following layers the concentration of pigment in the lacquer slightly decreased. This created translucency and the gloss. The middle layers consisted of pigment mixed in a seedlac/Venetian turpentine mixture, which resulted in a more mat surface. Also the flow was not as good. To observe the difference over the long term we made one panel with seedlac middle layers and one with Venetian turpentine/seedlac middle layers. I think that the one Venetian turpentine in it might degrade to a lesser degree than the one with seedlac alone. The final stage in the procedure was to apply pure seedlac, reaching the highest gloss. The recipe also describes polishing the surface after the last seedlac layers (most of the recipes do). In this short time period we could not do the polishing. When the panels are sufficiently dry the final polishing will be done.

Marianne’s Comments
The black lacquer panels that I made in the 1990’s are still in quite good condition. On some panels that I made(not pictured here) there are cracks in the surface that correspond to the grain of the wood in the substrate. Those that were made on poor quality wood show the most damage. Those that were done on stable plywood have remained unchanged.
Regarding the addition to Venetian turpentine to the middle layers, in my experience adding different materials between other layers will cause tension in the overall product, which may cause problems in the future though none have been observed to date.

No visible changes on this 1995 seedlac panel.
Red lacquer (Stalker and Parker)

Red Panels new left and old right
Jonas’s Comments
This recipe contains directions of three different red coloured lacquers; the common usual red, the deep dark red and the pale red. For the first two, the first layers were the same (vermillion mixed with seedlac). The mixing of the pigment into the seedlac went quit well, however, if allowed to sit, the pigment will fall to the bottom. It has to be stirred before use. The viscosity is lower than the first layer lacquer of the black lacquer. The covering power of the red mixture is also lower than the black lacquer. For this reason at least two or three layers are needed to cover the substrate evenly.
For the deep dark red more layers of seedlac mixed with dragon’s blood were applied to create a dark red colour. The dragon’s blood intensified the red colour of the substrate.
For the pale red, lead white had to be added to the vermillion mixture create to a light red colour. For all these different red varnishes the flow capacity was good, leaving no visible brushstrokes. The last layers of these sample boards consisted of pure seedlac making a gloss comparable to the black panels.
Marianne’s Comments
My past experience has been consistent with Jonas’s work. Vermilion/cinnabar, a mercury-based pigment is heavy and does sink, but as layers are built up on the panel the colour is even. Another problem that I have noted is in the process of sanding back the layers. The colour of the vermilion will become lighter if it is abraded directly. At one point to demonstrate this phenomenon I made two panels with exactly the same number of layers, the only difference being the direct abrasion of the vermilion pigment. In the photograph below, the vermilion pigment layer on the lower panel was sanded directly, however on the upper panel the pigment layer was protected with clear seedlac prior to sanding. Since this pigment is toxic I insist that others working in the lab apply at least two layers of clear seedlac before abrading to smooth the panel. Panels made in the past may have been brighter as it is unlikely they applied these health and safety measures.

Top Pigment not sanded, Bottom pigment sanded
The seedlac and vermilion panels made in 1995 have aged very well, with no cracks or delaminating observed. However, the panels with dragon’s blood/ seedlac layer on the surface now have a network of large cracks forming. Unfortunately it does not show well in these photographs and is only seen on the edges of the panel below.

Red with Dragon's Blood 1995
White lacquer (Stalker and Parker)

S&P White Japan made with Best White Varnish-1995 left , 2013 right
Jonas’s Comments
In the first step in mixing the lead white into the isinglass size we had problems because the viscosity was to high by which a good dispersion was not possible. We warmed the isinglass longer to lower the viscosity in order to mix the pigment better. The covering however, and flow was still not as good as with the black and the red and it took several coats to cover the panel well. The following layers of wheat starch worked out very well. The viscosity could be adapted to our needs by adding more water. By this reason the application worked out very well. For the last layers the panel had to be covered with several coats of the S&P “best white varnish”. The fist layers were no problem (covered very well, good viscosity, good flow, high gloss). Then the next the application of the following layer gave a really bad result. We think by some kind of tension the lacquer is stretched towards the middle and the sides of the panel, leaving accumulations of lacquer. Also the sanding worked out really bad. The sanding paper was in no time filled, making scratches on the surface.
Marianne’s Comments
In addition to the problems Jonas has outlined above one can see from the second photograph that it also does not age well. It has yellowed considerably in 18 years. There is a network of both large and fine cracks over the surface. The major cracks started to appear within six months and continued to deepen over the years. Now I can see there is a fine network of small cracks, which gives the surface, a slightly dull appearance. Overall this is not a varnish or method that I would recommend. If there were ever any objects made using this formulation it is doubtful that they would still exist today.

Cracking and yellowing of Best White Varnish
Blue lacquer (Stalker and Parker)

Jonas’s Comments
In this recipe the lead white was mixed with the gum water and the smalt with the Isinglass size before the two mixtures were put together. The smalt in the mixture was a problem because the particles directly sank to the bottom. Before each application it had to be stirred and applied quickly. The particles of the smalt were very large, which were visible by eye and left a mat surface.
Stalker and Parker claim this mixture should be the viscosity of “common paint” but I found it was much lower. Also because the hiding power was low, several layers had to be applied. The application of the isinglass worked out very well but the next layers of the S&P best white varnish gave a really poor result, similar to the white sample boards.
Marianne’s Comments
In addition to the above I will added that the colour of the final result varied with the proportion of lead white to smalt. Also not only does the lead white smalt mixture separate in the jar but as it dries it can separate on the panel. Since the lead white is at the top one can have pale looking panels. The result is much better is when there is little lead white in the mixture.
Because the varnish used on top the blue isinglass/gum water mixture is S&P’s best White Varnish the surface has yellowed and cracks have formed. The yellowing is not as noticeable on these blue panels.
Red varnish (William Salmon)

Jonas’s Comments
After the lacquer was prepared the consistency too viscous. For this reason an even application was not possible. To lower the thickness alcohol was added till until it resulted in a good consistency. The covering power was not as good as with the S&P red lacquer however the flow was very good. Because of the blood red colour and the uneven application it would make a perfect varnish for the imitation of tortoise shell.
Marianne’s Comments
The recipe for this varnish was not found in the japanning section of William Salmon’s book but the general varnish section. It’s intended use was not described. We thought we would see if it could be applicable for western lacquer.
It is tempting to take short cuts when one reads that this varnish must be heated for a week before use. Before heating this varnish had a watery consistency that would have not formed a good film. Just the day before use the viscosity increased rapidly. This was not due to evaporation, as the volume remained the same. As for the application, we did not succeed in applying it evenly, however I think with better brushes and practice it would be possible. It could be used as a red transparent varnish to enhance other colours or directly on wood.
Yellow varnish (William Salmon)

William Salmon's Yellow varnish on three grounds.
Jonas’s Comments
The viscosity of this varnish was after preparation very low; it had a watery consistency.
In the first layers there is indeed a yellow colour visible, but after a view layers have been applied the colour will turn browner. The varnish acts rather like dye then a film forming lacquer. It is only possible to create a weak film by adding at least five layers of varnish. The colour will darken also this way.
Marianne Comment’s
This varnish was also found the general varnish section of Polygraphice. It is clear from is handling properties that it is not suit to create lacquer. It could be used to enhance another colour. It is doubtful that is would be used as a film on its own.
Green Lacquer (Robert Dossie)

Robert Dossie's Green Japan on gold leaf ground
Jonas’s Comments
We chose for this lacquer to grind the pigment into the lacquer varnish to reduce the particle size and increase the covering power. At least three layers were needed to cover the surface homogeneously. But grinding the pigment into the varnish had a better result when we compared it to a panel Marianne had made earlier. For this colour I made two panels; one with seedlac and the other one with Dossie’s white lacquer. The viscosity of the white lacquer is somewhat thicker than the seedlac but this did not result in a big difference in the way of application. The seedlac darkens the colour more than the white varnish on the other hand it dries faster. The reason the white varnish dries so slowly is because of the high concentration of turpentine in its mixture. I expect the white varnish will probably degrade slower because of the softer resins used in the varnish.
Marianne’s Comments
The panels that Jonas produced were much better than the ones I have made in the past. In a sandarac based varnish used instead of Dossie white varnish I had difficultly getting the coarse verdrigris pigment to disperse evenly. Also the shellac I used was much darker than the seedlac used for this project. In ordinary room light the panel I made is an unpleasant brown while the recent one is a pleasing green colour. Both of the panels made in the 1990’s have changed very little over time.
Thank you for joining us
Below are Jonas’s panels packed for the trip back to Amsterdam. As Jonas intends to continue making more panels I will be looking forward to seeing the results.

Stay tuned to this Channel.
My next project to be posted here in the coming months will be the production of Asian lacquer sample boards. The materials and methods used will be based on recent analysis of Asian lacquer formulations. I intend to create sample boards of surfaces commonly found in western museums so there will be some panels made following Japanese methods of both high and low quality as well as Chinese export lacquer.
Marianne Webb