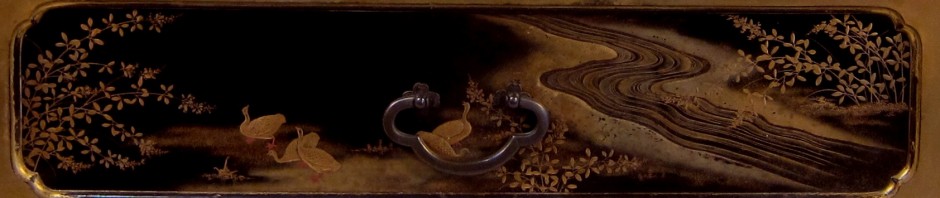

Marianne Comment’s
Acrid smells and the hint of something burning instantly sent conservators into alarm mode. It did not take them long to track me down with my chemical oven full of copal varnish. This was the scene some 15 years ago at the ROM when I was interested in studying the oil/copal varnish recipes. I produced a number of panels and small papier maché boxes before my colleagues persuaded me to discontinue the project. Unlike the spirit varnishes we are preparing for this study,in which the ingredients are dissolved in ethanol, oil copal varnishes are made by mixing hot linseed oil with melted copal resin. The final varnish can be thinned with turpentine. Metal and paper maché products coated with this type of varnish were dried in an oven for several hours or days. This hard durable coating could be polished to a mirror like finish.
I have always wanted to spend more time researching this type of western lacquer but not had the time. Fortunately others have. A good article by Christopher Augerson that was recently brought to my attention was published in the Journal for AIC, Spring Summer 2011 issue (Vol. 50, Number 1). Not only is it an excellent description of the copals available, the chemistry, and production of the varnish, but he has also included an extensive bibliography of recent and historical articles. It will provide you with reading material about resins and western lacquer long after this blog ends.

R. Dossie imitation tortoishell made with oil/copal varnish
Application of raised lacquer using a black-varnished panel
To practise on decorative techniques in lacquer we used one of the black panels to do some exercises. Today we will make raised figurations on the flat surface of one of the black panels. The reason of this practise is to obtain a better view of the possibilities and restrictions of the material properties. First the designs were chosen from the Stalker and Parker book. The figures were drawn on a piece of paper that was later laid over yellow ’carbon” paper on the surface of the sample-board. The drawing was traced using the carbon paper, leaving the outlines of the figures behind on the panel. Next a small amount of shellac varnish was saturated with calcium carbonate (CaCO3), similar to the preparation of gesso. In fact, also gesso could be used for making such raised sections. Next we had to decide what sections of the figures should be raised; in this case these were two birds. Normally western raised sections contain only big volumes; details like the legs or nozzle’s were usually left unraised mainly because of the limitations of the material. For the two birds on the sample board I chose to raise the whole volume to experience the limitations of the material and to learn from it. The lacquer mixture was to be applied using a little stick. During this process the mixture should follow the outlines of the figure. If you apply too much in a thin area the mixture flows easily over the line, so you really should be aware of the quantity you apply. This flow capacity is also the main reason why refined details are really hard to accomplish. This is opposite to Asian lacquer, where really fine details can be made. So, after the big volume of the figures was filled in the legs and the nozzles had to be carried out, this did not work very well. There were first areas where too much was added which had a poor result. A smaller quantity had the disadvantage that a straight thin line couldn’t be applied on the surface. Eventually to make these details small drops were applied beside each other but it wan not a good result. After the raised sections were dry they were gilded using leaf gold with oil size.

Mixing seedlac and whiting for raised areas

Black panel with traced designs

Black panel with raised areas

Black panel with raised areas gilded
Reconstructing red lacquer (William Salmon)
Last week we prepared this precious red lacquer. After it had has been warmed for one week, finally the day has come test it out. After straining the result was a really thick blood red substance. To our opinion it was even too thick to be used for pigmented ground layers. Because of this reason the mixture was diluted using ethanol. After a good consistence was obtained, four coats were applied to the sample boards (this is what we decided because the recipe gives no direction in the process of application). After the first layers had been laid on we applied another six layers. In this case we diluted a portion of the original batch with ethanol in order to create a translucency between several layers of varnish. Reflecting on the properties of this lacquer we have to admit that the lacquer gives no homogeneously covered surface as opposed to the S&P red varnish. This results in an uneven surface, however, it is not a disturbing factor because it creates a really nice depth and translucency. By this reason it could be a compatible varnish to make tortoiseshell imitations.

William Salmon's red varnish - 4 coats
Reconstruction of green lacquer (Robert Dossie) continuation
Referring to yesterday, we have two panels one with the seedlac/pigment dispersion and the other one with the white varnish/pigment in it. Today both panels will first undergo a sanding procedure similiar to the other sanding procedures earlier mentioned. After this six layers of pure seedlac or for the other panel pure white varnish had to be applied. For the seedlac this was no problem whatsoever but the white varnish was after three layers too sticky to put more layers on. The cause for the long drying time is because it contains a large amount of turpentine in its mixture.
Reconstruction of yellow lacquer (William Salmon)
Also for this one, after a week finally the day has come to test out this precious varnish. For commencement we had some objections like; is this varnish capable of forming a film because of low amount of resin in its composition and will it make yellow colour because of its ingredients (dragonsblood, aloe and saffron). Well, it became a really thin varnish (like water). It flows and colours homogeniousely, leaving a yellow colour with a brown tint, yet as more layers are applied this brownish colour may predominate. It is capable of forming a film but there are several layers needed and by then the brown colour will predominate. It is not capable of forming a covering layer but acts rather as a dye leaving the layer beneath still visible. We did several experiments with this varnish: first on a red coloured surface (using the S&P red lacquer as mentioned before), we prepared a sample board prepared with a yellow coloured ground using a gum water/ Indian yellow dispersion(bottom panel in the photo below), we used a sample board with a white ground using a gum water/titanium white dispersion(middle panel in the photo) and a panel only with the gesso ground(top panel in the photo). In the case of the red ground panel it delivered no exceptional difference in colour but a slight gloss was created. On the white ground panel and the gesso ground panel it resulted in a discolouring causing a brownish colour. Only the yellow ground showed a positive result where it increased the yellow colour giving it more strength probably also because of its brown tint, at least as a yellow colour is wanted. What could the use of this lacquer be? Actually in my opinion it should be used as a layer in a lacquer system between other layers where it can act to heighten the colour of a varnish and to cause in someway more depth and translucency.

William Salmon's Yellow varnish
Reconstruction of white lacquer (Stalker and Parker) continuation
Today’s objective was to try another time if it is possible to obtain a plain glossy surface using the S&P white varnish. For this purpose another sanding procedure was carried out. Eventually the next application of the white varnish was even worse!
We’re really curious to see if the white varnish reacts the same way on the blue sample board.