Marianne’s Comments:
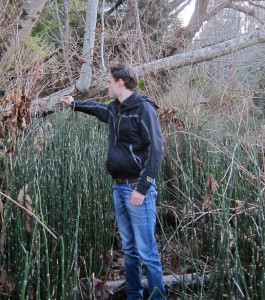
Today we started preparing horsetail so it can be used for sanding the panels, as they are prepared. On the Sunshine Coast in British Columbia where I live gardeners despise it. It is an ancient plant that spreads by rhizomes deep under the soil. If you pull it out it simply sends up new shoots. They shake their heads when I talk about how delighted I was to find it growing all over my property.
Horsetail is used all over the world as an abrasive. In Japan I have seen examples of how the stalks are braided to make a scouring pad or it can be strung together to make a sanding mat. Jonas will outline below references to its use in Europe. Although it is mentioned in early literature I have yet to find a description of exactly how it was used. Perhaps it was so common that no one thought to write it down. In the absence of information I have devised several methods for its use. If anyone has seen a written description in historic literature I would like to learn of it. I hope you enjoy Day 3.
Jonas’s Post Day 3:
Harvesting the Horsetail (Equisitum giganteum)
Today we went down the hill to harvest some Horsetail to experiment with its use as an abrasive.
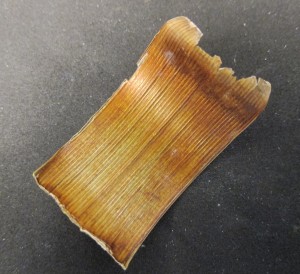
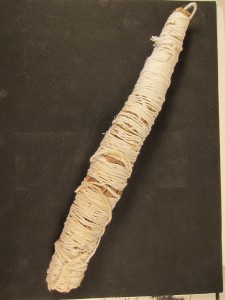
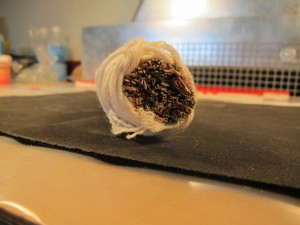
Historically this plant was used as an abrasive because the Equisitum contains very high levels of silicates (15% by weight). It is a bamboo like plant with whorls of knuckled needle like leaves. In historic literature it is known as rushes like in (Stalker and Parker) “rush it smooth”, They are also called Dutch rushes. They say “you can furnish yourself with it from iron forgers”. There is however no exact explanation how these rushes should be used. The horsetail stem could be cut off in small pieces and afterwards pressed between two wooden boards to flatten and dry them. Or the leaves of the plant could be used in a bundle held by string. (fig 39,40,41).
Botanical classification:
Kingdom: Plantae
Division: Pteridophyta
Class: Equisetopsida
Order: Equisetales
Family: Equisetceae
Etymologicaly the name Equisitum derives from the Latin equus (horse) and seta (bristle). Other names are: snakegrass and puzzlegrass.
Preparing a red varnish (William Salmon) continuation
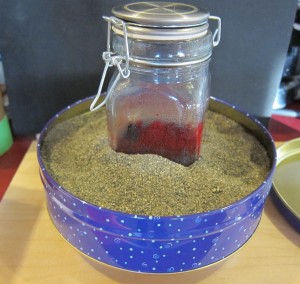
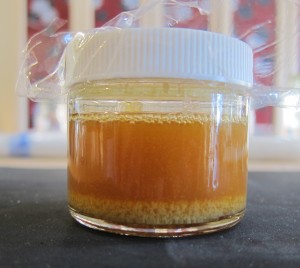
Yesterday we prepared this red varnish, and for today we have been setting up a way to heat the varnish. We used a coffee mug warmer on which we put a cookie tin filled with sand. The jar with varnish was put inside the tin filled with sand so that the varnish was beneath the level of the sand. The varnish will be heated this way for a week (fig 42).
Reconstructing black lacquer (Stalker and Parker) continuation
After laying the first three layers of thick black seedlac varnish, today we applied three more layers of the same lacquer. For these layers we used less pigment in the seedlac varnish. The next step in the process is to mix some Venice turpentine into the thick seedlac and strain it afterwards. Like the recipe says “Then with a quarter of a pint of the thickest seedlac mix of Venice turpentine the bigness of a walnut and shake them together until it is dissolved” (fig 43).
In this composition the vine-black has to be mixed just to colour the varnish, so the concentration of pigment will be much lower than before. As we are building up layers it is usual to put less and less pigment in the lacquer dispersion. By doing so the index of refraction or gloss will increase but it will also create a translucency between the layers of the lacquer.
We wondered why Venice turpentine would be added to the seedlac for next layers. How does it change the properties of the final varnish? This is why we used another sample board that had the same layer build-up as the former sample board. We will apply on one of these boards the following layers using the seedlac mixed with the vine black and the other one using the seedlac/Venice turpentine mixed with the vine black. Afterwards we will compare these sample boards with each other to see the difference. The Venice turpentine will probably cause a softer varnish and gloss may by this fact decrease. On the other hand will the harder seedlac may form cracks over time due to its brittleness.
Reconstructing red lacquer (Stalker and Parker)
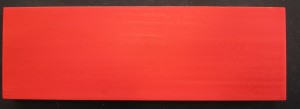
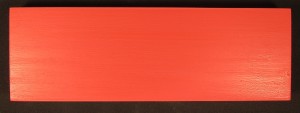
For recreating this lacquer we had to prepare three sample boards because the recipe contains descriptions of three different varnishes; the common usual red, the deep dark red and lastly the pale red. For all three reds the same binding media is needed (thick seedlac). Having prepared the seedlac, the vermilion or cinnabar pigment is with it. The seedlac varnish is needed for the common usual red as well as for the deep dark red. Again the lacquer needed a concentration of pigment, which covers the piece well but not as concentrated as with the black lacquer, like the recipe says “your mixture should have a thickness between thick and thin”. The two sample boards had to be covered with it four times (fig 44,45). For the pale red varnish the vermilion had to be mixed together with lead white in the seedlac. By adding the lead white we made the lacquer a little but lighter in colour than the former two sample boards. We chose in this case a lighter red than we actually wanted because the seedlac layers over top will darken the colour. The piece had also to be covered with it four times (fig.46)

